
B2B Site
Adding LED strip lights to your home or workspace can significantly enhance the atmosphere and aesthetics of any space. These versatile lights can be used to create ambient lighting, highlight features, or even provide task lighting. If you’re new to LED strip lights and unsure how to get started, don’t worry! This step-by-step guide, inspired by a helpful YouTube video, will walk you through the process of connecting LED strip lights with ease.
What You’ll Need
Before you begin, gather the necessary supplies:
LED Strip Lights: Choose the length and type suitable for your space and needs.
Power Supply: Make sure your power supply matches the voltage and current requirements of your LED strip lights.
Controller: If your LED strip lights are dimmable or color-changing, a controller is necessary to manage these features. Ensure the LED strip and dimmer are compatible.
Connectors: Depending on your setup, you may need connectors to join different segments of LED strip lights.
Mounting channel: For securing the LED strip lights in place.
Scissors: For cutting the strip lights to size.

First, measure the length of the area where you want to install the LED strip lights. Plan the placement to ensure the strip will fit and provide even coverage. Mark any areas where you may need to cut the strip or join multiple segments.
If your strip lights are too long, use scissors to cut them to the desired length. Look for the cut lines marked on the strip. Cutting elsewhere may damage the strip and prevent it from working.

If you need to join two segments of strip lights, attach connectors. Most connectors simply clip onto the copper pads on the end of the strips. Make sure the connections are secure and aligned.

- Identify the input and output terminals on the dimmer.
- Connect the LED strip to the output terminal of the dimmer.
- Typically, the LED strip has a positive (+) and negative (-) wire.
- Connect the positive wire of the LED strip to the positive output terminal of the dimmer, and the negative wire to the negative output terminal.
- Use connectors or solder the wires to ensure a secure connection.

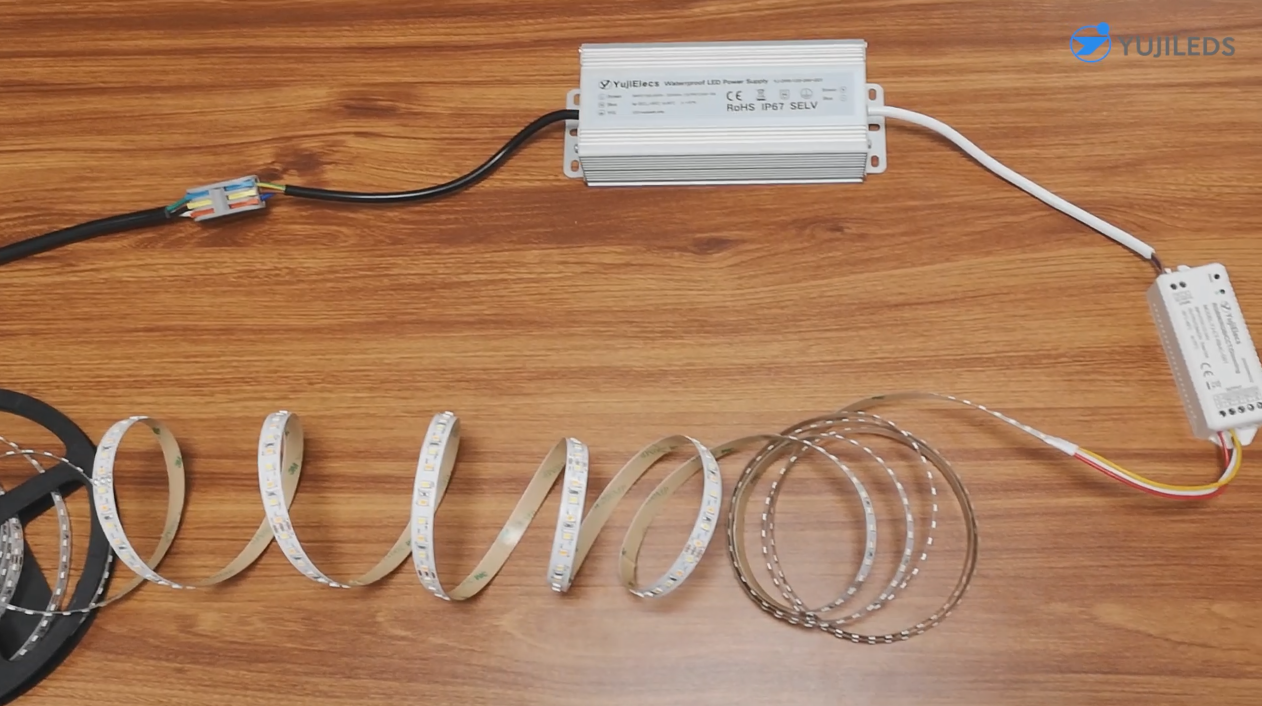
Next, connect the power supply to the LED strip lights. Start by attaching the controller to the power supply. Then, connect the strip lights to the controller. Ensure all connections are secure and that the polarities match.
- Connect the positive wire from the power supply to the positive input terminal of the dimmer, and the negative wire to the negative input terminal.

Before mounting the strip lights, test them to make sure they are working correctly.
- Plug in the power supply and test the LED strip.
- Adjust the dimmer to ensure it controls the brightness of the LED strip properly.
- If the LED strip doesn't turn on, double-check the connections and ensure everything is securely connected and insulated.


Carefully remove the adhesive backing from the LED strip lights and press them into place along your planned route. Alternatively, you can place the strip onto an aluminum channel to enhance heat dissipation and use a mounting roller for a more secure and convenient installation. Avoid touching the adhesive side of the strip too much to maintain its stickiness.


Once the lights are mounted, step back and assess their placement. Make any necessary adjustments to ensure the lights are evenly spaced and securely attached.
Enjoy Your New LED Strip Lights!
You’ve successfully installed your LED strip lights! Whether you’ve added a soft glow to your living room or vibrant colors to your workspace, you can now enjoy the enhanced ambiance these lights bring. Experiment with different settings and colors to create the perfect atmosphere for any occasion. If you are using Yuji high CRI LED strip lights, then congratulations, you will be able to experience a higher quality of light.
For a visual walkthrough, check out the YouTube video that inspired this guide here. https://www.youtube.com/watch?v=DvVu62gDQXs
Leave a comment